“The spore is in the wind tonight, you won’t feel it til it grows.” – Steely Dan, Rose Darling
Sourdough has been around as long as that small bacterial spore of lactobacilli landed in someones porridge that was left to ferment in some warm place. The ancient Egyptians coaxed the flavor from milled grain and water to make their breads and the Greeks used basil leaves to create the starter for their traditional sourdough. This bread product has a long history of bakers, pundits and scientists dissecting the types of bacteria that make great sourdough but the basic premise is that sourdough is long fermentation of dough containing natural lactobacilli and yeasts. Like the yeasts, the weaker lactic acids and stronger acetic acids ferment some of the sugars and create carbon dioxide gasses. Acetic acids contribute to the wonderful flavor in this dough as the sour taste. The carbon dioxide pushes against the gluten net forming the cell structure of the finished product.
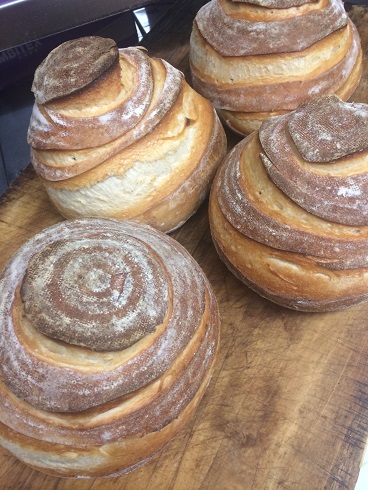
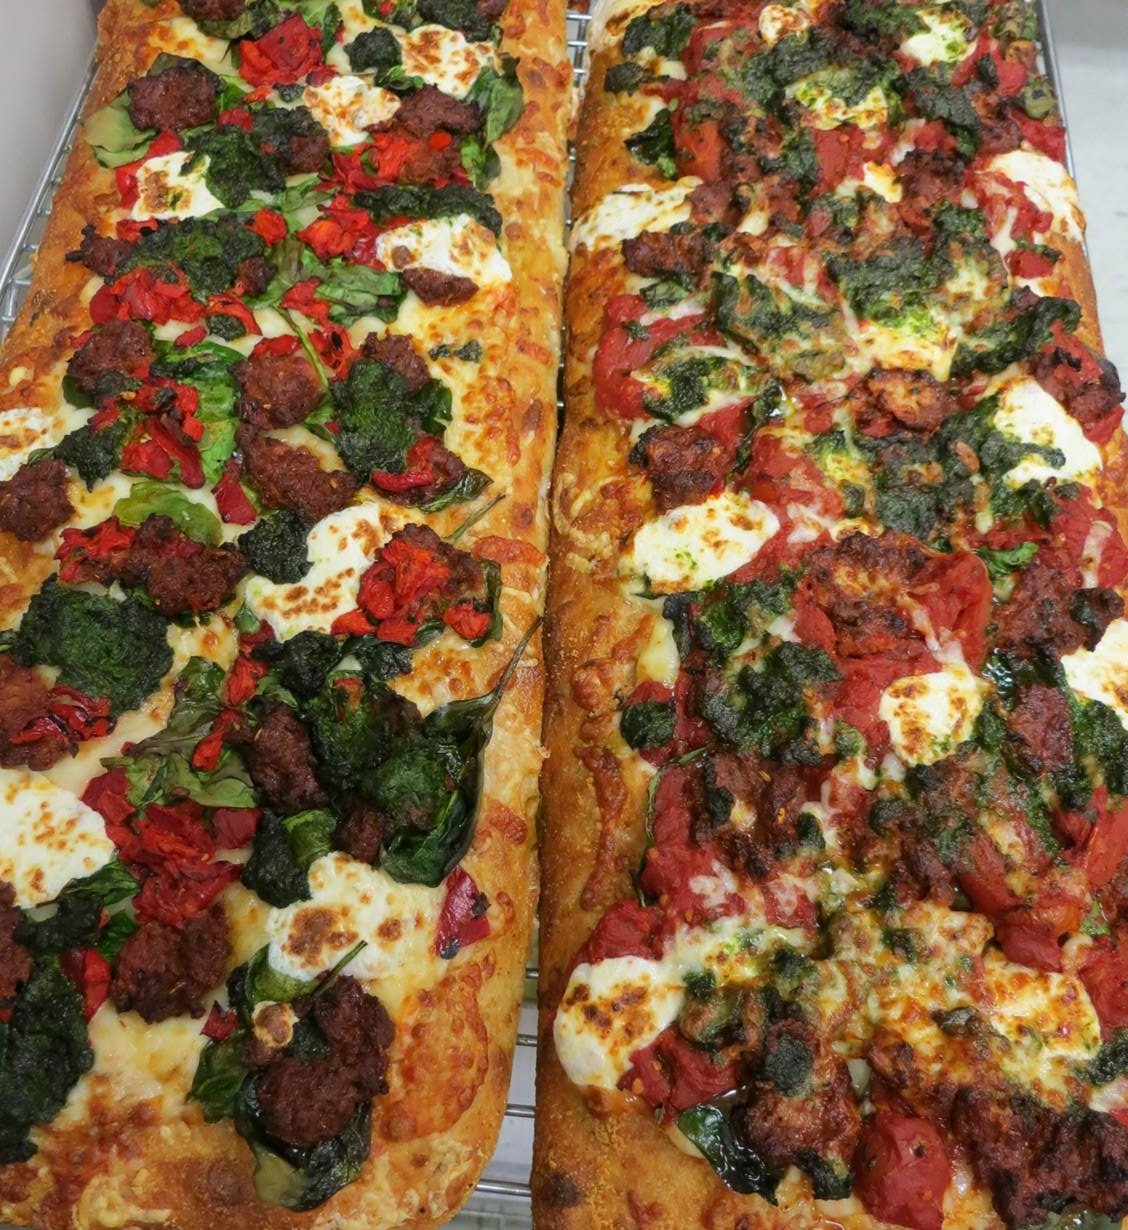
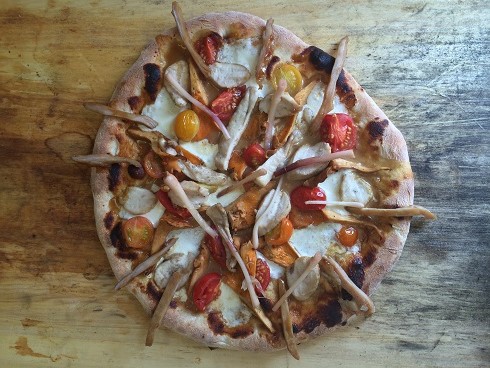
I’ve been working with sourdough breads and pizzas for 12 years now using straight natural starters as well as old dough, levain, biga, poolish and commercial yeast and any/every combination there is. I’ve found through massive fails and celebratory bakes that there is no single way to produce a fabulous bread or pizza dough. It all depends on time, temperature, flour, yeast, ovens, moisture and for me, what level of finesse my customers expect from me. Above left are the boule and above right the long, naturally fermented Pizza al Metro with fresh spinach, basil, Valoroso tomatoes and fresh mozzarella with ramp pesto and chorizo meatballs.
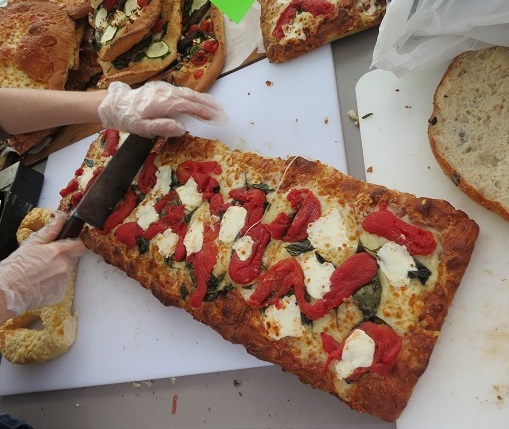
It takes a certain type of confidence in nature as well as a boatload of patience to not only make but especially to sell naturally-leavened sourdough pizzas. The time involved in coaxing the dough to optimum sourness is just one aspect making a great sourdough pizza. The technique involved in mixing, holding, forming, panning, proofing, par-baking, baking, cooling and serving is hard to explain to a cost-complaining customer who wants their pizza fast but also to heavy handed employees with other things on his mind. The intricate nature of making a great pan pizza is hard but the reward is in the smile achieved each and every time that beautiful square gets coaxed from the steel pan with its bark riding high.
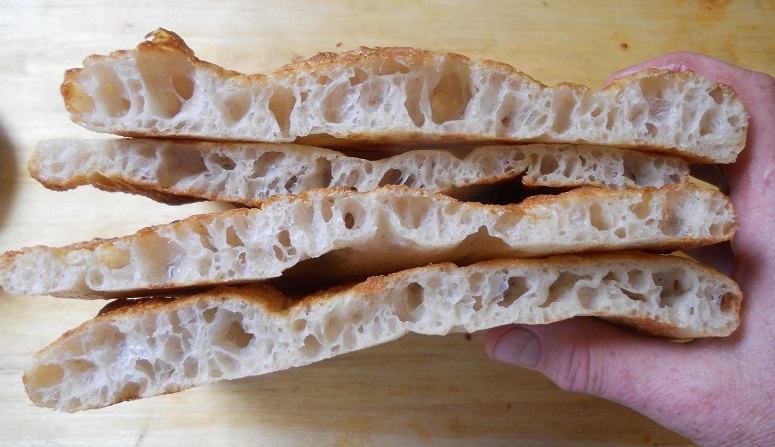
I have found in my very unprofessional experiments that I can get a better, more sour flavor from the acetic acids by having a 60 to 70 percent hydration level as compared to a more hydrated dough. As with my starter, it is derived from wild yeasts from the Dolomite Mountains of Italy which can tolerate more acidity than commercial yeasts. I’ve refreshed it every other day because the lower hydration (more like a wet biga or sloshy levain) enables the yeasts to eat slower. I do not use commercial yeast in the sourdough, only the starter, salt and water. The key to all this becoming a great bread and pizza is time and temperature. My baker Torrey Evans has also perfected the sourdough process and does it very well producing hundreds of crispy sourdough boules and batards and baguettes each week.
Here we go.
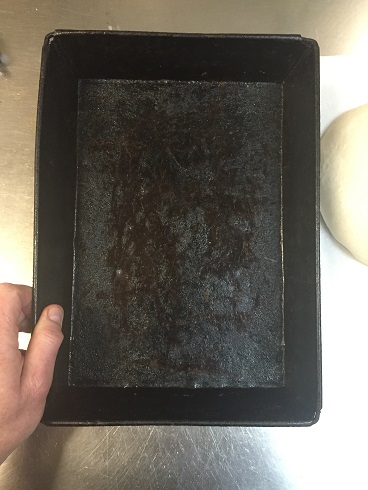
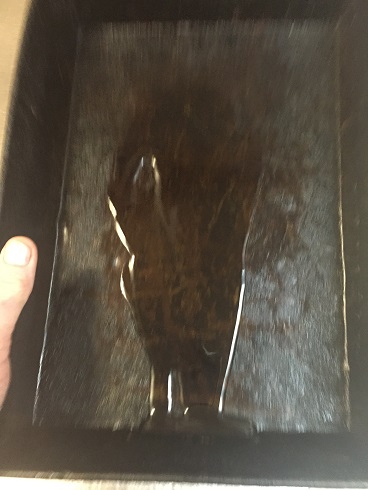
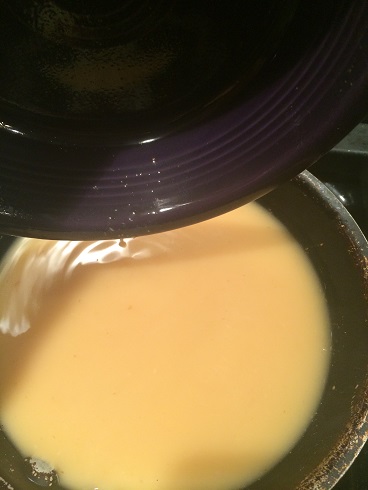
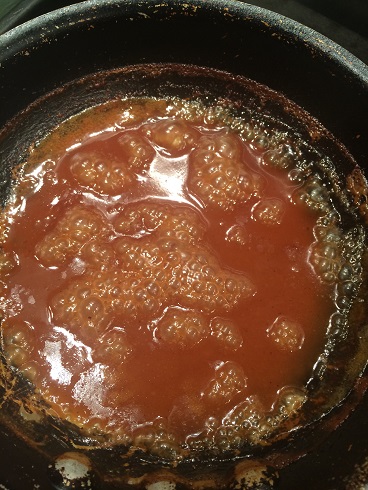
This is a steel pan. Some jamokes in Detroit call these.. ‘Detroit Steel Pans’ but most of mine were made in Pennsylvania. Nonetheless, they can be found anywhere and everywhere. They are fantastic for baking a great deep dish pizza in. First though, they need to be seasoned. Seasoning is the black coating of carbon on the inside and outside of every steel pan as it produces a better, more intense bake for any dough’s that are encapsulated in it. To season the pan, wipe with a very thin coating of oil. Vegetable oil seems to work best. Then cook the empty pan at high temperatures, (we prefer 550-600) but look out, the pan will smoke something fierce. Do this a few, maybe ten times for a deep, dark, black sheen of carbon on the steel and you are in business. To bake a pizza, add a coating of good extra virgin olive oil in the cooled pan and you are ready to make a great pizza.
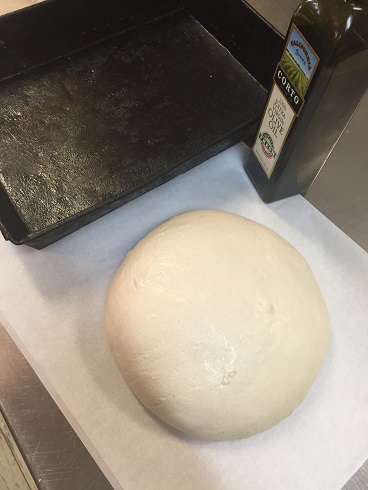
For this pizza, I used a 30 ounce dough made from Manitoba hard wheat flour and a starter of local Amish spelt and 14 percent protein flour. It was cold fermented for over three days and had a hydration level of 65 percent.


Taking the dough while still cold, I formed a square on a stainless steel table. Because the dough was cold, I was assured I wouldn’t do any damage to the gluten net that would have already formed (by the rise produced by the yeast) if I had let the dough proof in the warm air. I pulled the corners to accommodate the pan.

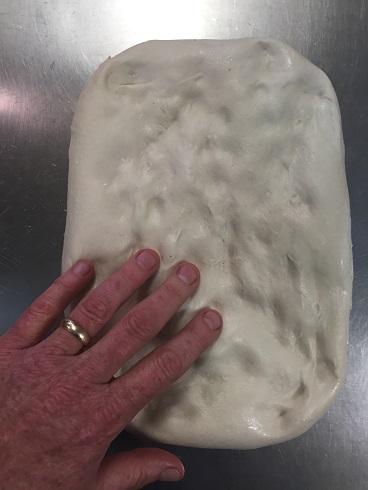
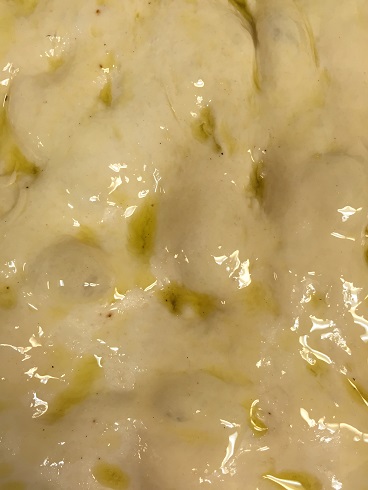
Then I used Corto olive oil made by my friends, the Cortopassi’s of Stanislaus Tomato Company fame. These guys are as psycho about quality as I am and I switched to their olive oil because simply, it is the best. After stretching, I used my fingertips to “dopple” the dough. This bears down on every internal part of the pizza making sure that a single mega-bubble of carbon dioxide will not blow up in the dough when I bake it.
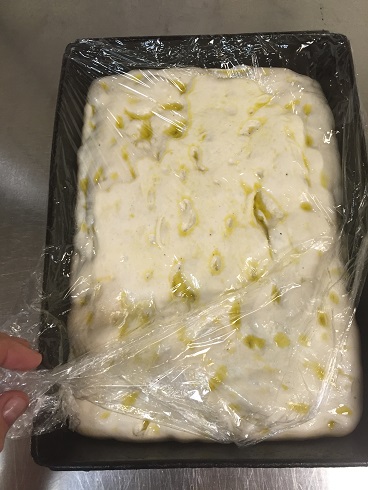
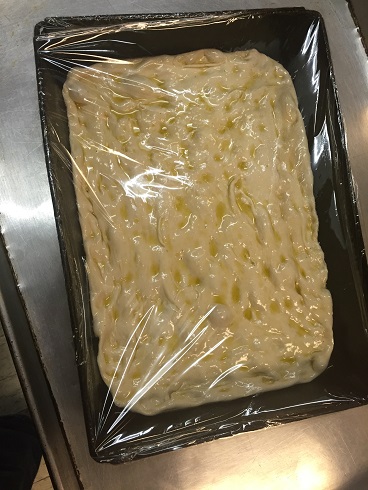
After covering with plastic wrap I set this pizza near my oven in 70 to 75 degrees to proof for an amazing nine hours. Because I am using natural yeasts that are converting sugars to carbon dioxide in a high-protein environment, the proof is warm, slow and steady. This gives time for the lactic acid as well as the acetic acids both time to thrive on the sugars. Both will create the carbon dioxide that will fill the high-protein gluten net creating the rise in this pan. The sides of the pan will push the cell structures toward the middle of the pan in a small hump. (Note- if I was to try to ‘correct’ the pizza now by sticking my fingers, a spatula or even a small knife near the edges or sides of this proofed pizza, I would ruin it by displacing the gasses and letting some excape creating a dropped or bowed effect anywhere I touched….leave it alone!)
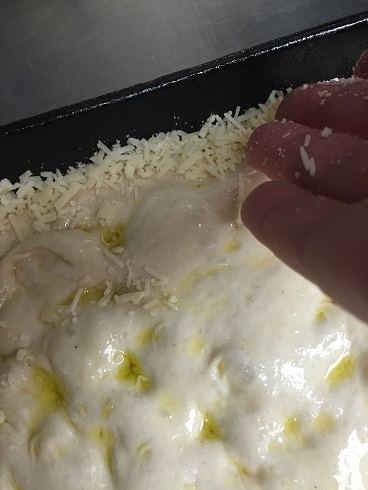
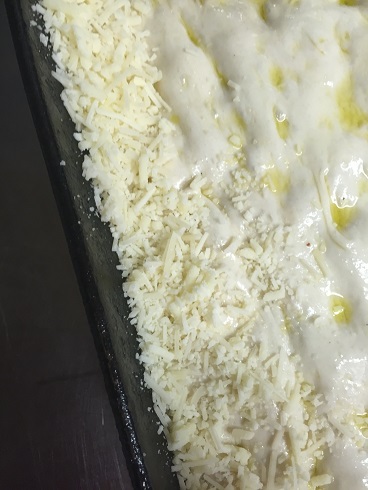
To create a level top to the pizza, I use an old technique of putting a hard-aged cheese around the side of the steel pan. Here I spread a few ounces of aged Asiago. This will act as a glue to keep the dough pushed against the side of the pan in my 550 degree deck oven.
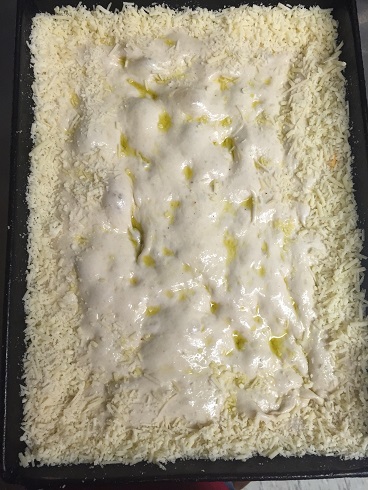
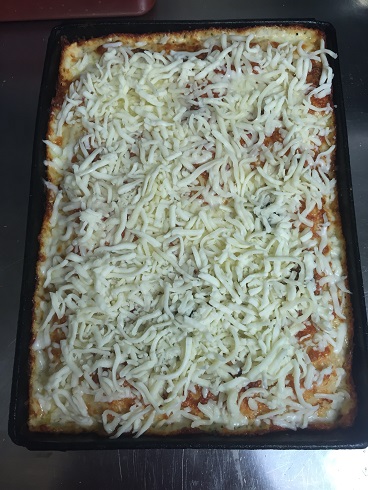
Before par cooking, I put some aged mozzarella all over the sides and top to help hold the dough down as it hits the heat of my hot oven.
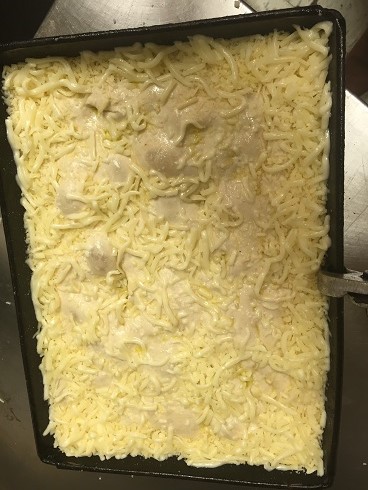
As you can see, after 12 to 15 minutes in a 550 degree oven, the area that I left bare of cheese “popped” up tremendously. Still, the Asiago glued to the side of the pan and held the pizza together. If I hadn’t done this the pizza would look like a mountain.
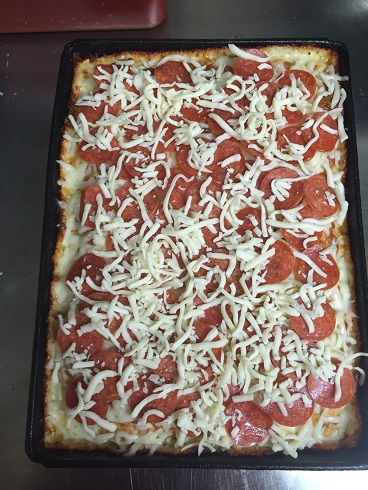
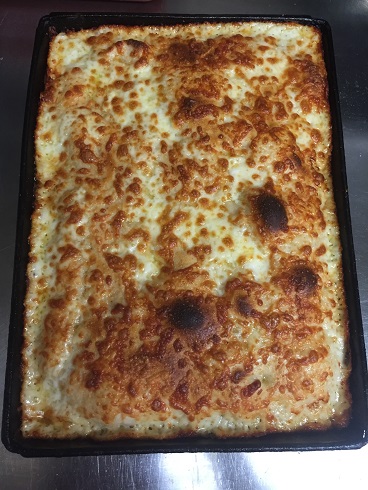
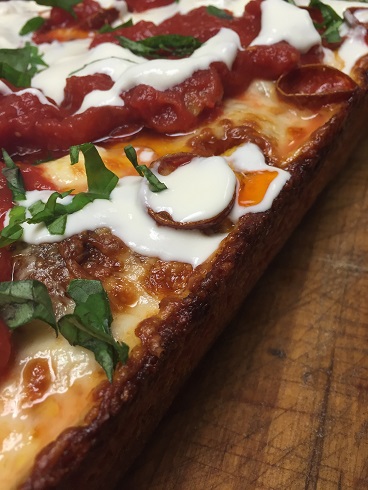
I let the pie cool for five minutes then topped with more aged mozzarella and provolone and some natural casing pepperoni that will ooze out some glorious juices cooking under the cheese.
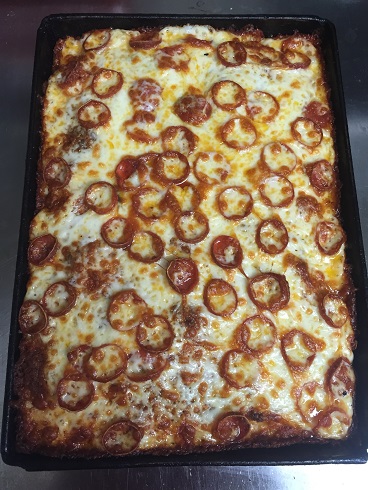

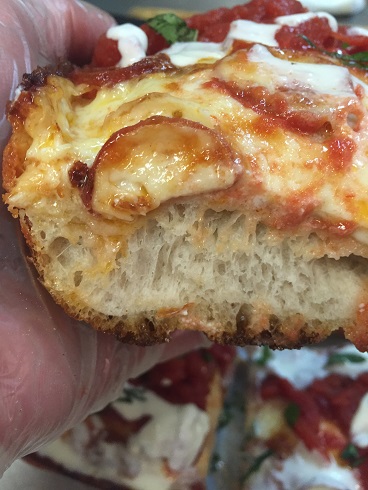
I then returned the pizza back to the oven for the final bake, (12-20 minutes should do it, just remember, you have to cook the interior of the pizza dough, there is nothing worse than cutting into a pan pizza and finding dough- this is why I use a long proof time.) I’m crying now….it is a thing of beauty!
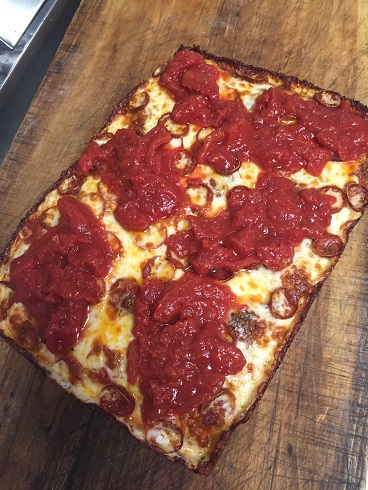
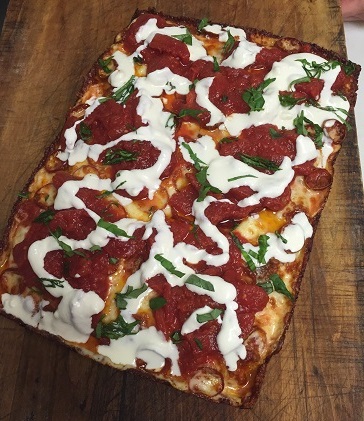
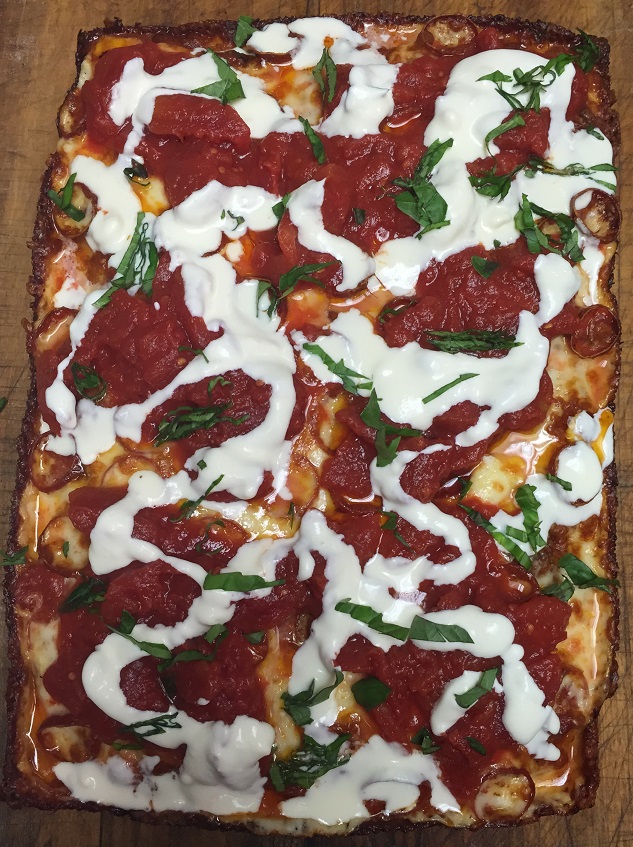
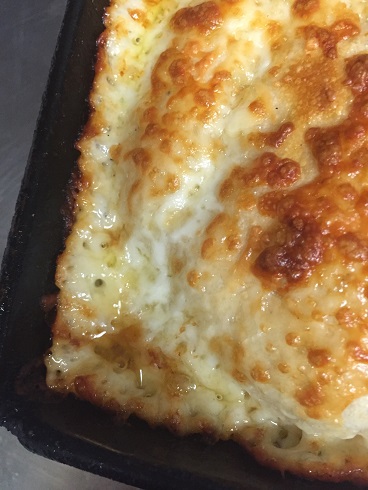
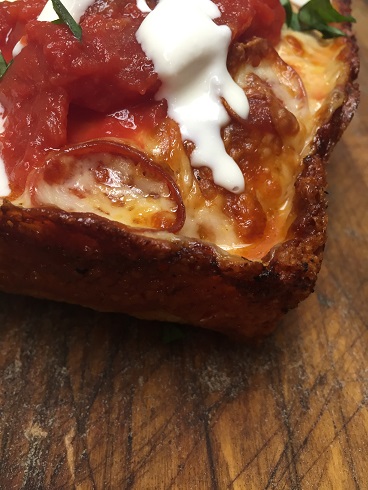
I let the pizza sit for at least seven minutes to set the bark along the edges. The key to any sourdough pizza in my neck of the woods is to have a bark that is intact and not fallen down by taking out of the pan too soon. I topped this with some crushed Stanislaus pear tomatoes and some local Snowville Crème Fraiche mixed with just a touch of ricotta as well as some chopped fresh basil.
I suggest leaving the pizza intact just to gloat at the magnificent thing of beauty you have created.
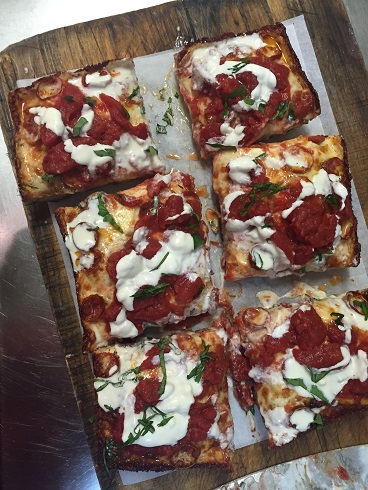
Then slice away and pig out on the crunchy corners first saying to yourself, “All good sourdough comes to dems dat wait.” Amen!