Archive for the ‘Northern Italian Pizza Recipes’ Category

Guanciale; The Chuck Norris of Pizza Toppings

march 2014 150tt

Pizza is Americas food, that’s a fact. On the thousands of pies my business makes each year, a massive portion of my customers have chosen bacon as a topping. The word itself sends middle-aged, pre-heart-attack victims like myself into a frenzy because the thought of that smoky, melting fat atop a slippery glacier of melting mozzarella is the stuff of dreams. It is hard to mimic or turn anyone away from the thought of crunchy, porcine goodness but there is another, more silky alternative to that streaky belly fat: Enter Guanciale; the jowl or cheek cut from the face of the pig!


march 2014 421ii


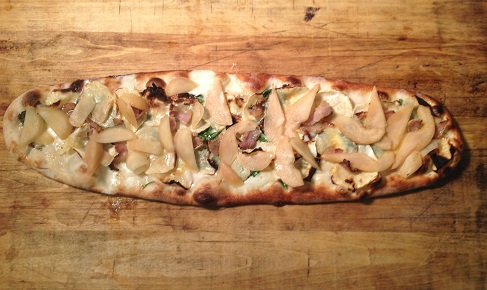
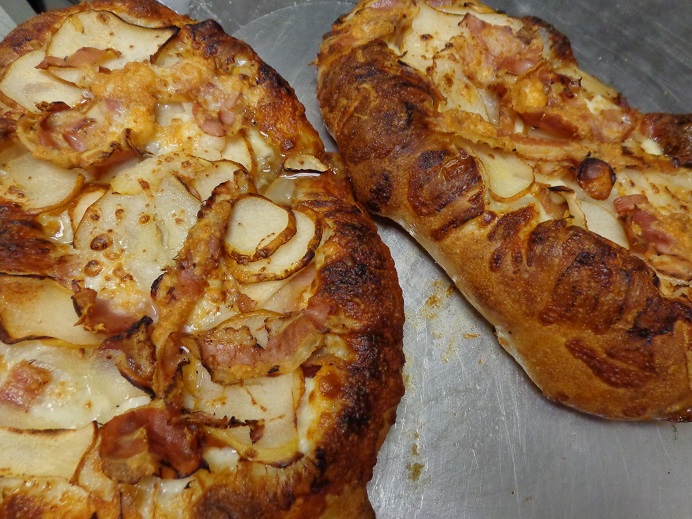
Above is some awesome Red Wattle, (heritage breed pork) guanciale that I cured with a long crisp Spanish syle Coca crust, Teleggio (an Italian Alpine cheese)  roasted celery root, fresh basil and killer Bosc pears grown by Neal Cherry in Crooksville, Ohio that I have citrus-pickled.


Because of my inherent shallowness, I interpret the relationship of smoked pork belly fat vs. unsmoked pork facial fat as that of Bruce Lee vs. Chuck Norris. Bruce was the king of Kung Fu and, just like bacon, he was my hero when I gazed upon him kicking the shit out of bad guys on Green Hornet. Chuck was another bad ass (after Bruce had broken the martial arts-as-entertainment barrier) that transformed his talent in that memorable movie, Good Guys Wear Black. Both of these guys amazed and rocked my world just like bacon and jowl, unfortunately, Bruce is gone but Chuck Norris can split the atom with his bare hands! So lets make some guanciale!


guan3 guan5


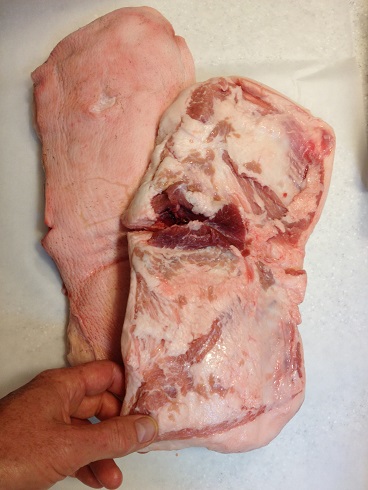
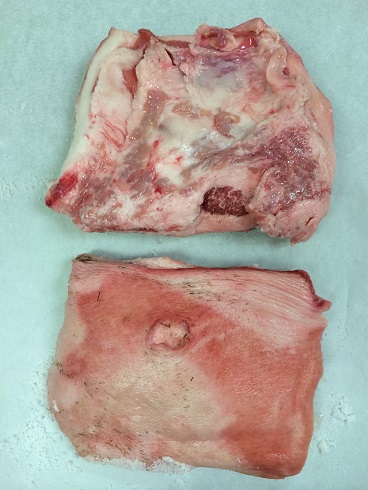
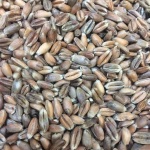
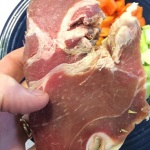
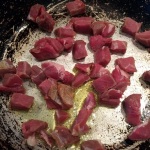
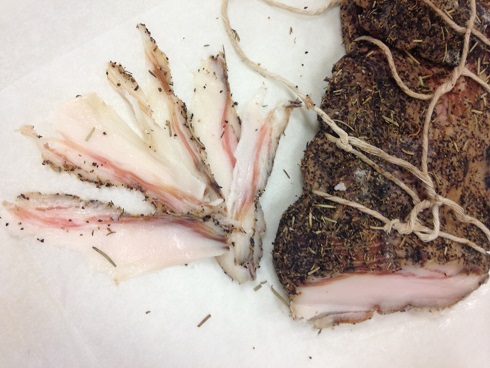
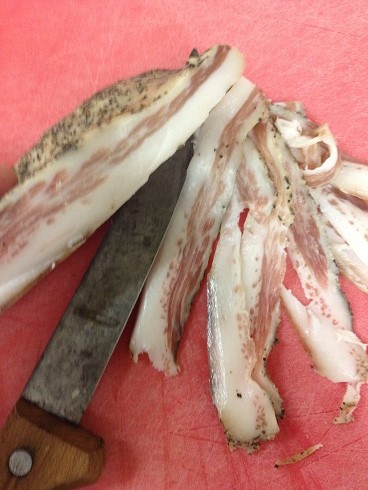
First, let’s start with a pork cheek from your local butcher or pig farmer. An excellent butcher can give you a skin-on cut that extends from the cheek down to shoulder, (like above, which I love). I trim any and all glands I find. They are soft, greyish and are easily distinguishable from fat like the cut above with a gland in the middle of the jowl. I also cut the cheek in two to help with the cure but I always leave the skin on. The pork “cheek meat” or oyster may still be left on the face. It is a roundish hunk of flesh that most butchers cut off to expedite the curing process but if you are lucky enough to have this wonderful piece on, just leave it.


guan2


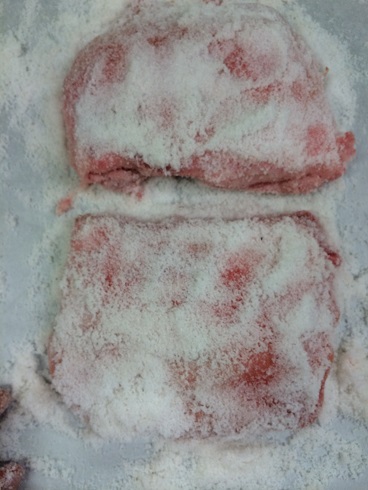
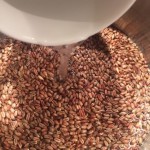
To cure the guanciale, take a cup of course sea salt and vigorously rub the meat all over. Wrap tightly in plastic wrap and then in a large plastic bag without any air in it. Refrigerate for two days. Many people say to weigh the jowl down but I leave it alone because I don’t need a uniform piece of jowl. Just a thick slice of that porky goodness that will melt on a pizza.

After the two days, re-rub the jowl. You may have some juices to get rid of also. Re-wrap and set in refrigerator for one or two more days, depending upon how salty you want the jowl.


guan1 guan020iii


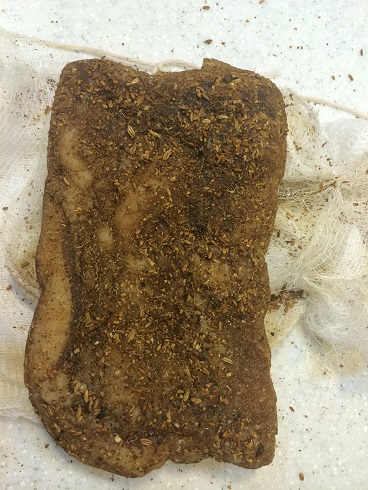
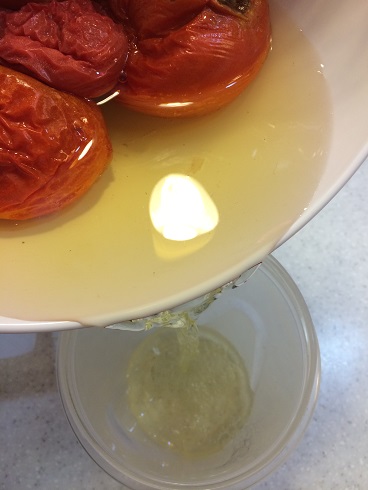
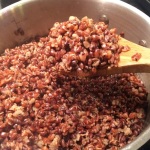
On the last day, rinse all the salt off and dry the jowl completely. I like to immerse the jowl in a baggy of white wine for an hour before drying again, (I like what the fruit does to the fat) then I rub like a madman with cracked peppercorns, roasted fennel seeds, roasted cumin seeds and rosemary that has been whipped up in my spice blender. (This is where puristas and me part company.) Because I am melting this flesh on a pizza, I want as much nuanced flavor to come out of this fat as possible, so I give a great shiatsu massage to this pork with strong spice and less salt. Yum.


guan6 guan7


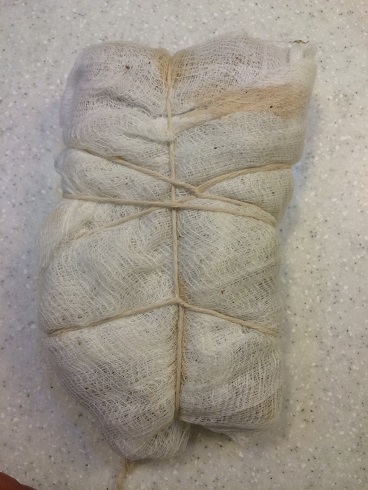
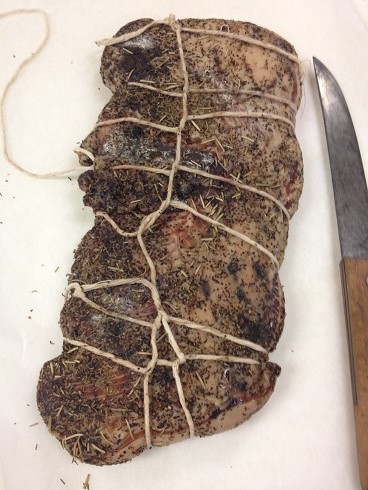
There are many ways to hang your cheek in the drying chamber. The best chamber to use is a white wine cooler that you can buy for under $300 clams. Just set the temperature for 55-60  and place a bowl of salted water at the bottom because your curing will need some moisture. The fan on these wine cabinets offers enough airflow to complete a good cure. (Optimum cure temperature is between 55 and 65 degrees with a humidity of 70 percent.) The first way is to wrap in a double layer of cheesecloth and tie with twine this will keep any herbs and spices in place but still able to breathe. The other way is to wrap the cheek in the herbs and use plastic wrap to force the spices and herbs in place then unwrap the plastic and remove before tying. Both of these have worked for me.


late summer 2014 290tt late summer 2014 292iii


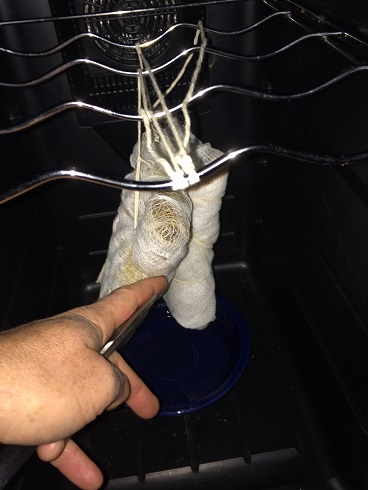
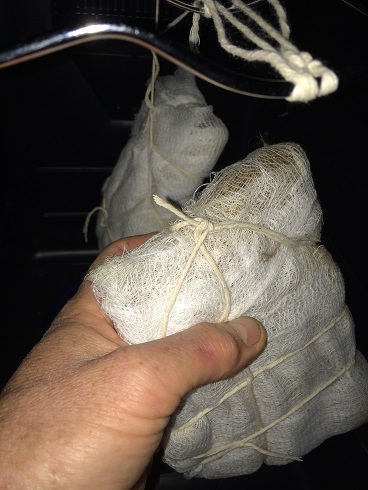
Tie the guanciale up for four to five weeks or until it loses 30 percent of their bulk.


guan11 2014 nov, pics 248tt

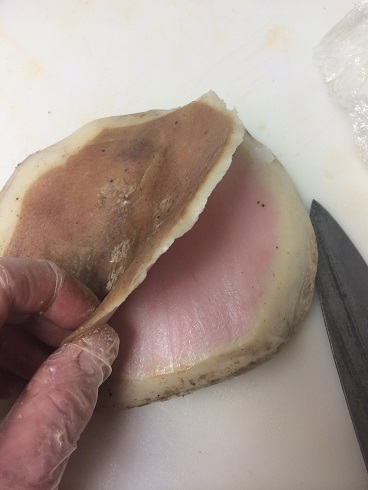
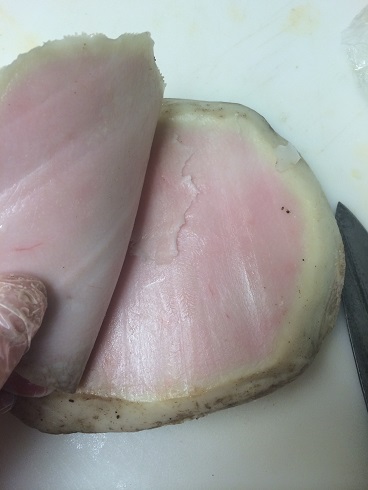
I’m tellin’ you… on that day that you go to your chamber and remove the guanciale, it’ll feel like your birthday. After wiping off some or all of the spice, get a sharp knife and cut the skin off. Any mold that is white is okay, any other mold is a concern. If you encounter any mold, wipe with vinegar until it comes off.


guan9 guan10


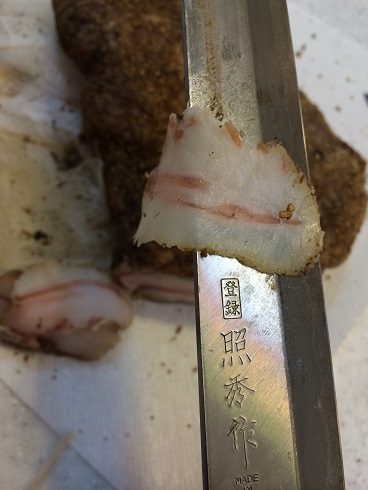
Then place the thin slice on your tongue and wait for the gorgeous melt to happen. Man oh man, if Chuck Norris wasn’t so fucking weird now, you’d be tempted to invite him over for some guanciale and a bowl full of nails.

guan12 guan13

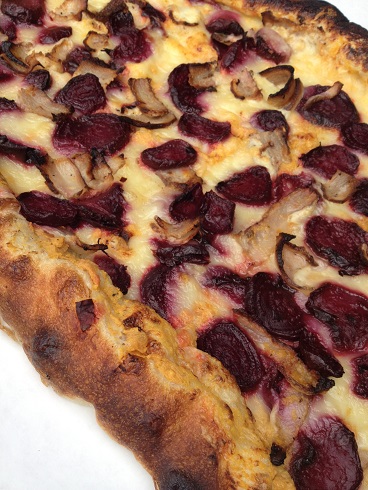
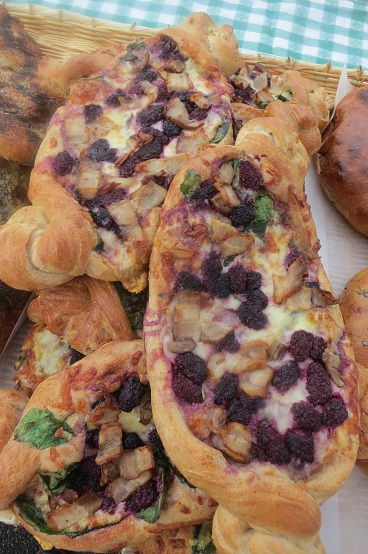
Above left is a Pizza Romana baked at 700 degrees with caramelized shallots, chevre, beets and local cheddar curd or for another magnificent flavor profile, above right is a knotted Turkish Pide with fresh local blackberries atop guanciale, aged mozzarella, provolone, fresh spinach and topped off with maple syrup.

sept 2012 058iii

Or, if you have the guts, you can make a killer schiacciata with Stilton, walnuts and pear with that crisp melting guanciale taking it’s final bow for now!


Liquid Pizza

dec 2014 072ee

Of all the lame-brained ideas I’ve obsessed over, this is the top of the top. That said, I just had to go with the idea of taking the raw ingredients of a beautiful pizza and building the flavors up from scratch to actually taste like a pizza but only in its purest, liquid form. (Above is my two-week labor of love which, my wonderful wife who is my harshest critic said, “…tasted exactly like a fabulous…pizza.”)

dec 2014 055ee

Many chefs are breaking certain iconic dishes down only to built them back up using cooking methods, chemicals and faux ingredients to re-create said dish in another, wacky way. This is especially true for challenges in cooking shows to test the flexibility of a chef. It is great to think of any dish in a different way by throwing out the visual, historical and textural preconceptions by interpreting a culinary item on taste alone. This fun and challenging concept for a pizza was done without the use of gels, chemicals or fancy kitchen machines. I also made a promise that for the sake of your sanity and what’s left of mine, I promise you that I will, at no time use the term; DECONSTRUCTED.

dec 2014 124ee

The pizza I targeted is a Neapolitan style pizza topped with Prosciutto di Parma and Parmigiano Reggiano. I cooked the pizza above at 800 degrees and it demonstrated that perfect Neapolitan taste. (Dontcha just love how that Prosciutto melts.) I now had to replicate the wheaty char of grain, the sweetness of tomato like the San Marzano’s above, followed by the ultra-umami found in Parmigiano Reggiano, the salty-fat-fruit of Prosciutto di Parma, the vegetal kick of fresh basil and the milky mozzarella.

First, the Tomato:

Every year at the height of tomato summer, I get the largest, juiciest locally grown, heirloom tomatoes and freeze them. Then, in the depths of winter, I take them out and just put them in a bowl to defrost. Letting gravity and warmth transform these beauties is amazing and quite simply the best way to get tomato water from these beasts. I then create a a winter gazpacho with fresh herbs, diced vegetals and crabmeat.

For this project the tomato water came from three distinct heirlooms; Sweet Azoycha Russian yellows , Green Zebras and Cherokee Purples, all organic and locally grown by Green Edge Gardens in Amesville, Ohio.

nov 2014 007ee nov 2014 006ee 2014 nov, pics 307ee

When each tomato started leaching the almost colorless water, I drained each tomato group a separate bowl and let gravity continue to push the liquid out more.

2014 nov, pics 267ee

Then I was ready for just a little salt and a few days flavor-meld in the fridge.

For the Parmesan:

This may seem to some cooks as particularly wasteful but I gotta tell you, its worth it!  You’ve not lived until you do a shot of Parmigiano Reggiano water! The simple act of separating the fat and solids by grating the parmesan and throwing it in boiling water, turning off the heat and letting time and temperature pulls the strong flavor out of the solids and opens a whole new culinary dimension for this king of cheeses. You can take this liquid and make ice cream, gels, “Cheetos-like” crackers, dashi or even make parmesan caviar with the help of sodium alginate and calcium chloride.

nov 2014 070ee nov 2014 072ee nov 2014 077ii nov 2014 087ii

I placed about eight ounces of grated parmesan, including the rind, into four cups of just-boiling water then turned the heat off to let it cool while stirring constantly.

nov 2014 100ii nov 2014 106ii dec 2014 044ii

When the mixture cooled enough, I placed it in the fridge for three days to meld the flavors and separate even more. After a final skim, it is ready.


For the Crust:

2014 nov, pics 325ee nov 2014 001ee nov 2014 004ee nov 2014 014ee

Finding a wheat taste in liquid form was my toughest challenge so I opted to start with the grain in a harvested berry form. The local spelt berries are grown twenty-two miles away in Chesterhill, Ohio were a perfect start. The Amish grow copious amounts of this deep-tasting grain and they harvest it with horses. My plan was to first toast the hard outer shell it under high heat then braise it to cook the grains, or berries. This released the earthy, chocolate-tea-toastiness so prevalent in this spelt. After toasting, I covered them with water and boiled them over medium high heat for three hours until the endosperm popped through the hard husk of each kernel.

nov 2014 042ee nov 2014 043ee

The vision I had in my head compared to what was happening in reality was very different while rendering the spelt into liquid,The plump endosperm that popped through the bran and charred outer shell of each kernel was magnificent and bloated exposing the white glutinous heart of each kernel. I had to concede that this gluten was an integral part of the fluid I was making and no washing or straining would get rid of the gravy-like liquid. Even though this was not what I had envisioned but the taste was magnificent and I knew I had nailed it. (I even made a killer salad out of the berries.)

nov 2014 044ee nov 2014 047ee nov 2014 045ee nov 2014 049ee

So I added water to it and blended it again then reduced the liquid for thirty minutes, straining again with a finer and finer sieve. After cooling, the presence of the gluten and bran made a thicker liquid but still had the taste of a hearty, toasted wheat. I was finally there.


For the Basil oil:

dec 2014 032ee dec 2014 036ee dec 2014 040ee dec 2014 042ii

I took a handful of basil then cut and mashed it, adding extra virgin olive oil. I then held it to macerate for five hours then strained it. I could have made it more bright green by shocking the chlorophyll in the basil with heat and ice water but I had to get the kids from school.


And for the Prosciutto di Parma:

nov 2014 021ee nov 2014 022ee nov 2014 027ee nov 2014 033ee

I usually make some great cracklings out of the shank product that I get from each prosciutto leg but I also make a killer reduction of this, the king of hams. I first took the shank and cubed it then sautéed it on medium high heat with a tablespoon of extra virgin olive oil to brown each chunk. Then I added a mirepoix, (celery, onion, carrot).

nov 2014 040ee nov 2014 051ee nov 2014 053ee nov 2014 037ii

When all the flavors melded at medium high heat, I turned the heat down and added one cup of chicken stock and two cups water to cover the mix. I left it to gently simmer and breakdown for 20 minutes before extracting all the solids. This left me with a liquid which I reduced on high heat for 10 to 15 minutes until it was thick and tasted like the purest essence of Prosciutto di Parma!

dec 2014 051ee

My first few attempts at placing this flock of liquids on a plate, in a soup bowl and even in a shot glass failed miserably until I found the right layering. I am no freakin’ scientist but I soon found that each liquid had certain weight and density that pushed downward from gravity.

dec 2014 050ee dec 2014 057ee

So after many trials, (massive fail on left), I found that the placing spelt on bottom followed by Prosciutto di Parma gravy, then the Parmesan water followed very gently by the tomato water and topped with basil oil was the way to go. Because of the strong flavors in the Parmesan and prosciutto liquids, I added more of the nuanced tomato water for a better balance.

dec 2014 055ee

dec 2014 052ee


dec 2014 068ee

Finally, I turned the mozzarella into the most luscious liquid of all. Just by melting it in a pan, it liquefied and completed this wonderful shot of pizza with a blanket of goo. (As I proudly introduced this liquid to my employees, they asked where the vodka was- maybe next time!)